
Spring and summer rains don’t have to ruin outdoor plans. Instead, use it as a teaching opportunity. A rain gauge project is a great way to help kids learn about science, weather, and gardening. Making a rain gauge requires only a few simple, common household items and takes little time or skill.
Weather and Rain Activity Lessons
For gardeners, measuring the amount of moisture that falls can help determine what plants will perform well with minimal outside irrigation. It can also inform you of how much moisture to collect if you were to install a rain barrel. A DIY rain gauge is one of the easiest ways to assess rainfall, plus it is a family friendly project with teaching potential for the kids.
Getting kids out in the yard or garden to learn about science firsthand is much more fun that classroom work. Weather is one topic that is perfectly suited to learning about right in the garden. Meteorology is the science of weather and it requires measuring tools.
A rain gauge is a simple measurement tool that tells you how much rain has fallen over a period of time. Start with creating a rain gauge with the kids. Choose periods of time to measure rain fall and then check it against official measurements from the National Weather Service’s website.
This simple experiment can lead to a whole series of lessons and learning about how rain affects your plants, soil and erosion, wildlife, and more.
Making a Rain Gauge with Kids
This is a simple activity to teach kids about rain. You can easily make a rain gauge with a few things you have around the house.
If you are a soda drinker, you are in luck because this is a key component to a homemade rain gauge. Choose a clear bottle so you can easily read the level markings and view the moisture collected inside.
The rain gauge instructions require:
- An empty plastic bottle, a big two-liter bottle is best
- Scissors
- Tape
- Permanent marker
- A ruler
- Pebbles
Making a rain gauge is a quick project, but young children should be assisted and supervised during the bottle cutting.
Cut off the top of the bottle, just at the start of the widest point. Turn this top portion upside down on the bottle and tape it in place. Make sure the top is off. This will act like a funnel for the rain falling into the bottle.
Put a layer of pebbles in the bottom of the bottle (you may also use sand). This will keep it weighted and upright outside. Alternatively, you can bury the bottle a little way into the soil in the garden to keep it in place.
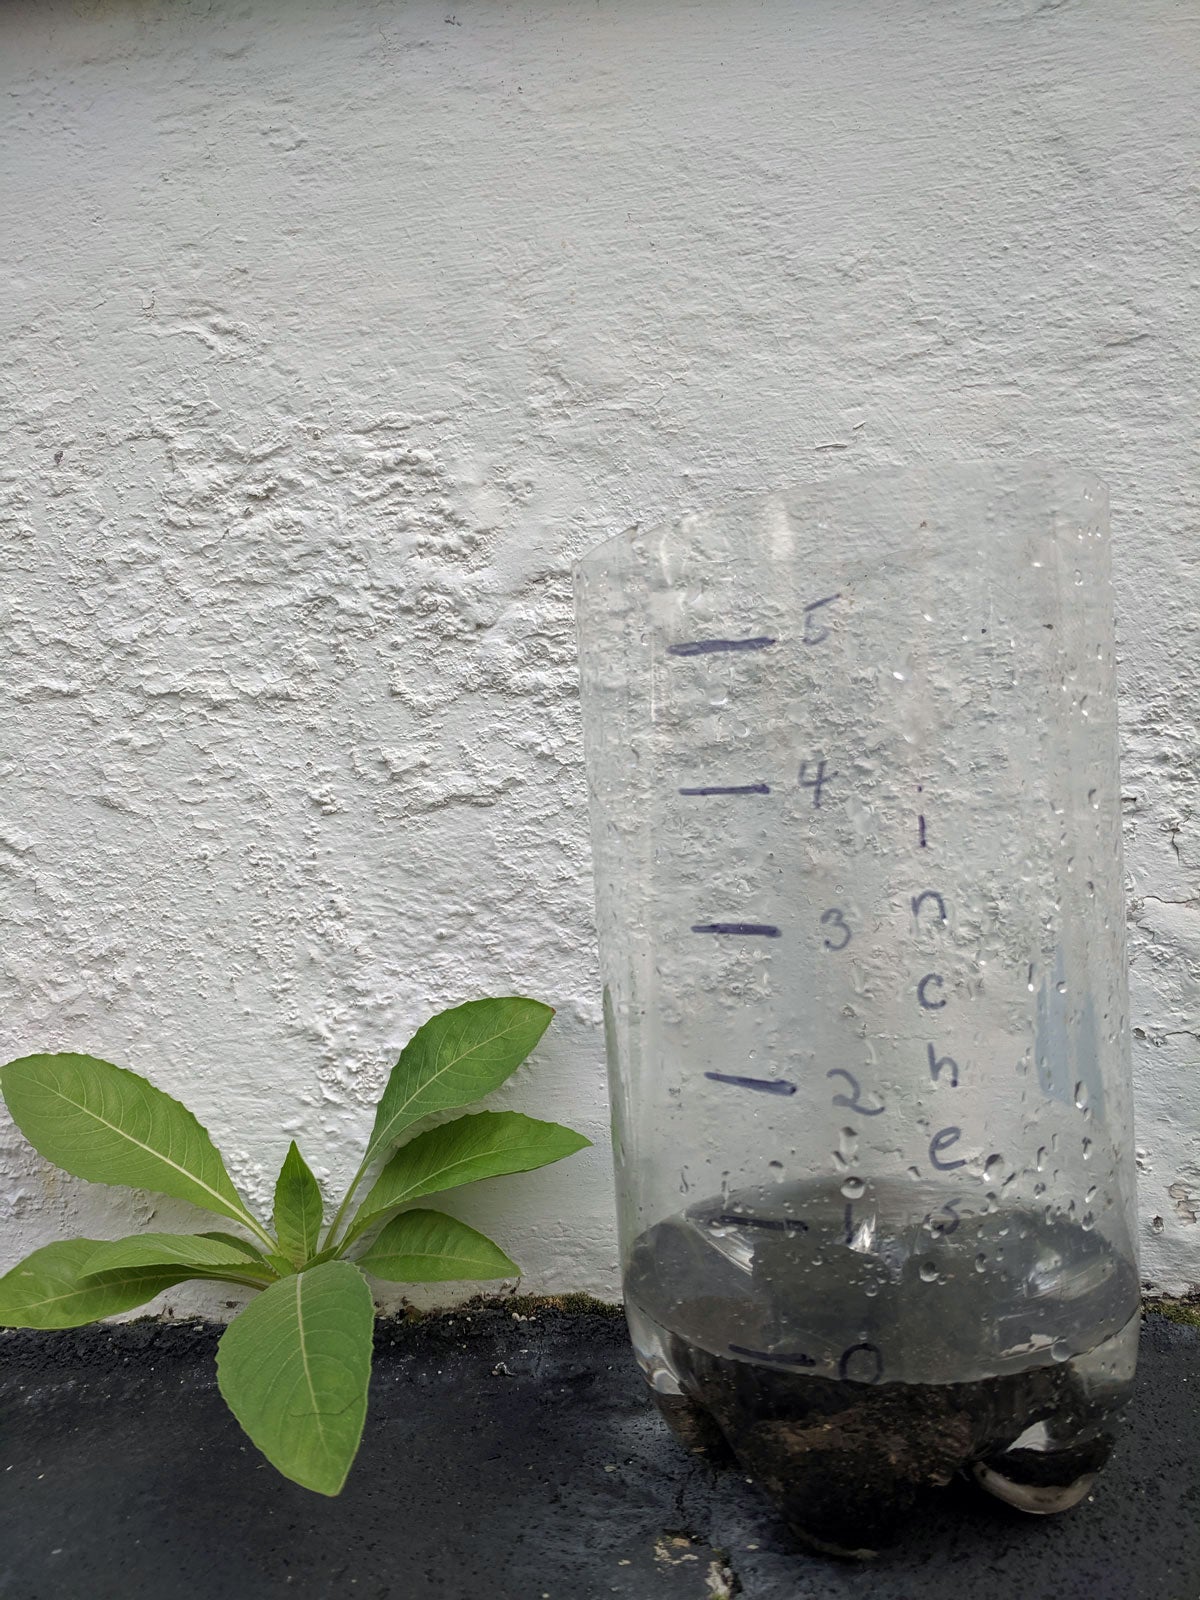
Use a ruler and permanent marker to mark measurements. Use inches on one side of the bottle and centimeters on the other side, starting with the lowest measure towards the bottom.
Further Rain Gauge Instructions
Add water to the bottle until it hits the zero measurement (lowest) mark, or use the top of the pebbles/sand as the zero line. Place the bottle in a level area outside and note the time. Measure the water level at any interval of time you decide on. If it’s raining heavily, check it every hour to get more accurate results.
You could also bury the bottle part way and insert a measuring stick with specific marks on it inside. Put a few drops of food color in the bottom of the bottle and as the moisture meets them, the water will turn color, allowing you to pull the measuring stick out and gauge rainfall by where the stick is colored.
Half of the process of science is comparing and contrasting as well as collecting evidence. Keep a journal over a period of time to see how much rain comes in weekly, monthly, or even yearly. You can also group data by season, for instance, to see how much comes in the summer versus the spring.
This is a simple rain activity lesson that kids of almost any age can do. Scale the accompanying lesson according to what’s appropriate for your child’s age. For younger kids, simply measuring and talking about rain is a great lesson. For older children, you can have them design more experiments in the garden involving rain and watering plants.
Spring and summer rains don’t have to ruin outdoor plans. Instead, use it as a teaching opportunity. A rain gauge project is a great way to help kids learn about science, weather, and gardening. Making a rain gauge requires only a few simple, common household items and takes little time or skill.
Weather and Rain Activity Lessons
For gardeners, measuring the amount of moisture that falls can help determine what plants will perform well with minimal outside irrigation. It can also inform you of how much moisture to collect if you were to install a rain barrel. A DIY rain gauge is one of the easiest ways to assess rainfall, plus it is a family friendly project with teaching potential for the kids.
Getting kids out in the yard or garden to learn about science firsthand is much more fun that classroom work. Weather is one topic that is perfectly suited to learning about right in the garden. Meteorology is the science of weather and it requires measuring tools.
A rain gauge is a simple measurement tool that tells you how much rain has fallen over a period of time. Start with creating a rain gauge with the kids. Choose periods of time to measure rain fall and then check it against official measurements from the National Weather Service’s website.
This simple experiment can lead to a whole series of lessons and learning about how rain affects your plants, soil and erosion, wildlife, and more.
Making a Rain Gauge with Kids
This is a simple activity to teach kids about rain. You can easily make a rain gauge with a few things you have around the house.
If you are a soda drinker, you are in luck because this is a key component to a homemade rain gauge. Choose a clear bottle so you can easily read the level markings and view the moisture collected inside.
The rain gauge instructions require:
- An empty plastic bottle, a big two-liter bottle is best
- Scissors
- Tape
- Permanent marker
- A ruler
- Pebbles
Making a rain gauge is a quick project, but young children should be assisted and supervised during the bottle cutting.
Cut off the top of the bottle, just at the start of the widest point. Turn this top portion upside down on the bottle and tape it in place. Make sure the top is off. This will act like a funnel for the rain falling into the bottle.
Put a layer of pebbles in the bottom of the bottle (you may also use sand). This will keep it weighted and upright outside. Alternatively, you can bury the bottle a little way into the soil in the garden to keep it in place.
Use a ruler and permanent marker to mark measurements. Use inches on one side of the bottle and centimeters on the other side, starting with the lowest measure towards the bottom.
Further Rain Gauge Instructions
Add water to the bottle until it hits the zero measurement (lowest) mark, or use the top of the pebbles/sand as the zero line. Place the bottle in a level area outside and note the time. Measure the water level at any interval of time you decide on. If it’s raining heavily, check it every hour to get more accurate results.
You could also bury the bottle part way and insert a measuring stick with specific marks on it inside. Put a few drops of food color in the bottom of the bottle and as the moisture meets them, the water will turn color, allowing you to pull the measuring stick out and gauge rainfall by where the stick is colored.
Half of the process of science is comparing and contrasting as well as collecting evidence. Keep a journal over a period of time to see how much rain comes in weekly, monthly, or even yearly. You can also group data by season, for instance, to see how much comes in the summer versus the spring.
This is a simple rain activity lesson that kids of almost any age can do. Scale the accompanying lesson according to what’s appropriate for your child’s age. For younger kids, simply measuring and talking about rain is a great lesson. For older children, you can have them design more experiments in the garden involving rain and watering plants.